Very Important!
Always list the sizes width x height and double check your measurements.
Remember the old carpenter's adage, measure twice cut once.
Standard Overlay
To get the sizes of your new door when replacing hinges we recommend you add 1" to the width and height of your cabinet openings for your doors and drawer fronts. This gives you the industry standard 1/2" overlay on all sides of the opening.
If you have an opening that uses two doors butted together, measure the width of the opening and add 1", divide that in half, then subtract 1/16th from each door. This will give you room to adjust the center gap between the two doors after they are hung. You still add 1" to the height of the doors.
Standard Overlay
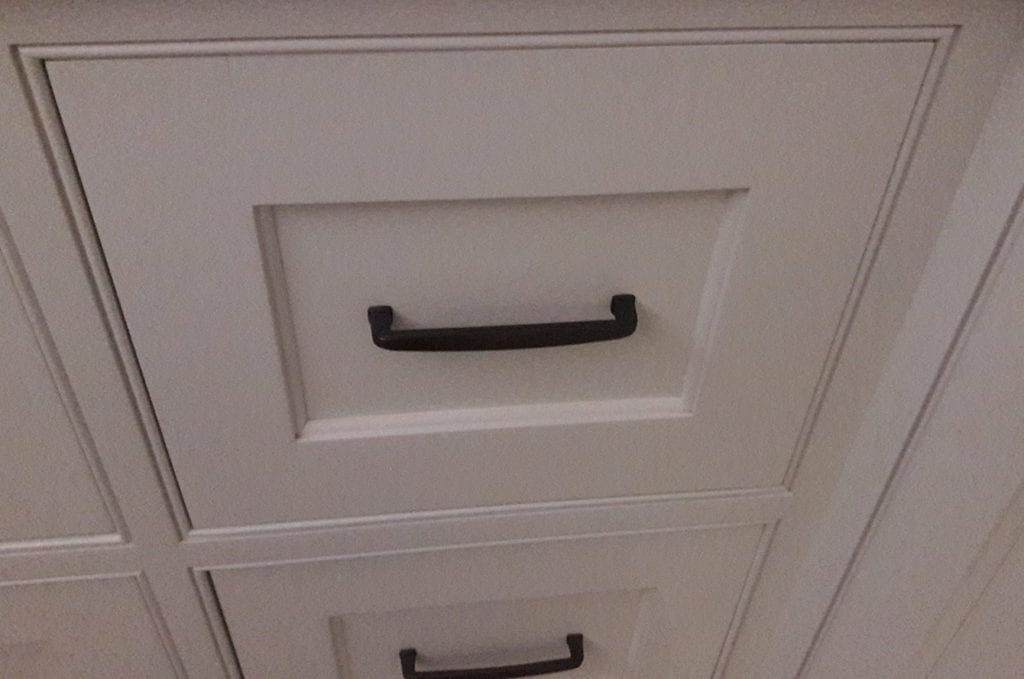
To achieve a full overlay effect (the doors and drawers cover most of the cabinet frames) on a framed cabinet we recommend you use a hinge overlay of 1/4" less than the width of your cabinet frames. Most cabinets feature a 1 1/2" face frame. In this case, you would use a 1 1/4" overlay hinge (adding 2 1/2" to the width of your opening). This provides a nice full overlay effect without the risk of interference from adjacent doors.
You can use a greater overlay but keep in mind you must leave the room (1/8" minimum) where the doors meet back to back on the hinge side to ensure proper functionality.
If you have an opening that uses two doors butted together, measure the width of the opening and add 2 1/2", divide that in half, then subtract 1/16th from each door. This will give you room to adjust the center gap between the two doors after they are hung. You would still add 2 1/2" to the height of the doors.
You can follow the same recommendation for drawer front width but the height may need adjustment to ensure a matching distance in between.
Diagonal corner cabinets should also be adjusted (generally to1" overlay).
Note: Hinge side is determined from looking at the front of the door while it is closed on the cabinet. You can order the doors to be the same size they are now. You just need to determine what your overlay is. Overlay refers to how much the door overlaps on the hinge side. You can determine this by measuring the width of the door, subtract the width of the opening and divide that in half. For example, if the door is 1” wider than the opening, that means it overlays 1/2" on each side, so you would select 1/2" overlay hinges.
What About Lazy Susans?
If you have Lazy Susan doors that mount to a shelving unit and spins around inside the opening, Lazy Susan doors are simple to measure.
Simply turn the door around inside the opening to measure the back side. Measure from the outside edge of the door to the point where the doors meet in the back ( left diagram A) and from the top to bottom (left diagram B).
List Lazy Susans as 2 doors. The doors are 3/4" thick, so one door should be 3/4" narrower. We will make the wider door with a wide frame on one side where the other door will attach.
The doors will be made with a 115 square edge on one long side where the two doors but together. (Example: 1 - 11 x 27 and 1 - 10 1/4 x 27) Just order the doors at the size you need, then when you get to checkout you will see a place to enter notes pertaining to your order. This is where you will re-state the door sizes to point them out as Lazy Susan doors.
If you have the kind of Lazy Susan Door that mounts to the outside of the cabinet and both doors swing open with a piano hinge attaching them, it's a little different. Measure one side of the Lazy Susan opening (both sides should be the same, but not always) and add your overlay (usually 1/2") Then subtract 3/4" for the piano hinge to function in the corner (right diagram AA) List your doors separately with hinge boring requested for only one of the doors. You will need to make a note at checkout, requesting a square edge profile on one long side of the doors where the piano hinge will attach.
Other Things to Consider
Prepping Drawers To prepare your drawers for the new drawer fronts, simply saw off the existing front making sure to leave square ends. Add a piece of pine to the front of the drawer to screw the new drawer front too.
It is usually a good idea to pre-drill holes in the sides of the drawer for this purpose. Some extra sturdy drawers are even easier to prepare. Just cut off the overhang of the drawer front so the drawer will slide back into the cabinet flush with the frame.
Make sure the remaining front is still solidly attached before installing your new drawer front with screws.
One final note of caution: Be very careful not to put a screw through your new drawer front when attaching it. Pre-drilling the drawer box itself is always a good idea.
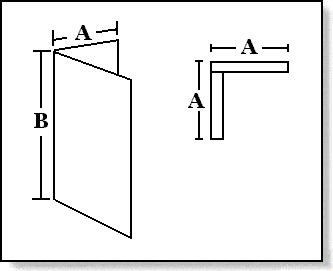
Lazy Susan Cabinet Door
1 - 10 x 28 - square edge on the right
1 - 10 3/4 x 28 - wide frame and a square edge on left
Lazy Susan Door that mounts to the outside of the cabinet and both doors swing open with a piano hinge.
1 - 10 x 28 - square edge on the long side
1 - 10 x 28 - square edge on the long side
